6 Steps to Integrating ON24 Webinar Emails with NetLine

How can you get more engagement from your webinars? Learn the tips, tricks and tactics that make webinars work at Webinar World 2019.
Integrations today are a critical part of the marketing stack puzzle. But getting applications to talk to each other — whether an integration runs directly from app-to-app or uses a third-party solution, like Zapier — isn’t always easy. Recently, we’ve partnered with NetLine, a scalable lead-generation solution, to help drive ON24 webinar syndication through its powerful tool. NetLine’s solution allows us to build an offsite content hub enabling a continual lead flow from third-party sources.
Often, third-party syndication can result in a disconnected experience for registrations. For example, registering for a webinar on another website can cause delays between the time a potential attendee registered and the time a confirmation email is sent. This creates a small window of opportunity to either get the registrant to add the live event to their business calendar or to access the on-demand recording. It should be no surprise that when you introduce delays in the handover process, your attendance rates suffer.
To make this partnership better, we created a Marketo integration to seamlessly receive webinar registrants from NetLine directly into ON24’s webinars. We have to say that we’re quite satisfied with the integration and wanted to share our little recipe with you.
Integrating NetLine and ON24

There are two ways you can get NetLine and ON24 to talk to one another. The first is the easiest: use our direct integration with NetLine that brings NetLine registrants to our native Webcast Elite form. The second way is to map NetLine to a marketing automation platform, like Marketo, that then maps back to ON24 for faster email communications.
The setup for option number two is easy: We start by creating a Marketo form to be used for the NetLine registrations. NetLine recommends a unique form for each campaign, but we opted to use just one form and to distinguish traffic using hidden fields (if you’ve ever had to make urgent updates on all your Marketo forms, you will appreciate the importance of keeping the number of forms to a minimum).
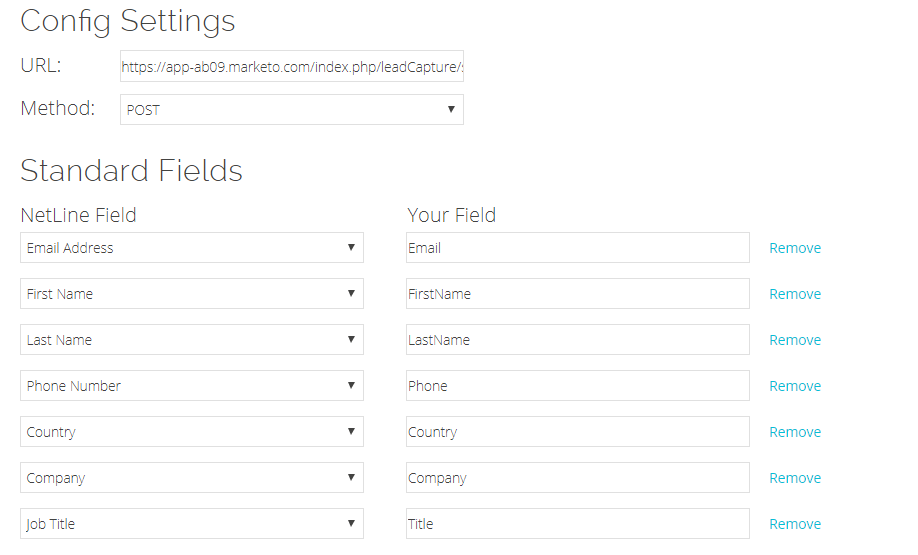
Once we had our form, we went to NetLine and set up the field mapping at the account level. We set the post URL and map each of the NetLine standard fields to the fields we are using on the webinar registration form:

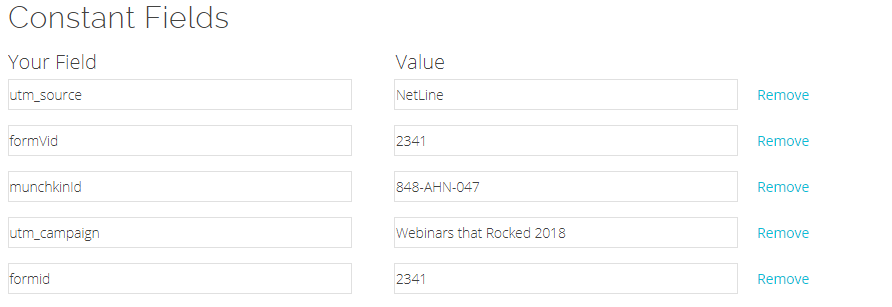
In this account-level configuration, we also indicated our unique form; this is a “constant” that will show up with each new campaign:

That’s it for the account-level form setup. On to specific campaigns.
Adding NetLine Campaigns

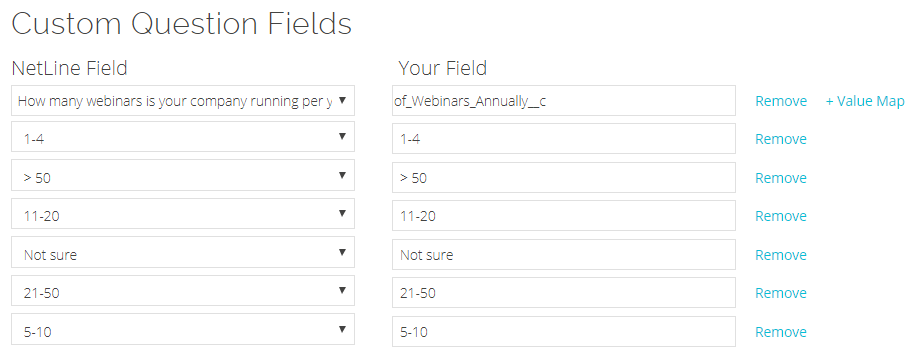
The NetLine campaigns are where we add custom fields to the form. We have just one non-standard field, so we add that here, along with its picklist values:

Then the final step of the form setup is to set the campaign-level “Constants” – that is where we add the identifiers for the specific webinar. For this example, we’ll use “Webinars that Rocked 2018.”

We are using our “utm_source” and “utm_campaign” fields as the identifiers here. Our Marketo program for the webinar listens for form-fills with this form ID as well as this utm_campaign.
Leads flow in and the Marketo program takes it from there: the lead is registered for the event in Elite, and the confirmation email containing all the needed webinar information goes out to the registrant.
Wrapping Up
Integrating with the NetLine platform gives us seamless registration. The handover from NetLine to Marketo to Webcast Elite works well. We can capture registrant attention while interest is high and deliver an ON24-branded email inviting the registrant into the on-demand recording. As a result, we’re able to drive higher conversions from registration to attendee rates, ultimately improving our on-demand attendance while drastically cutting the time it takes to upload leads.